Phase 01 · Steps 01–02
Gather
A waste stream is diverted. Shells leave the kitchen bin and become material.
- Collected from local restaurants — oysters, mussels, cockles
- Separated from food waste and sorted by type
Community work.
 Back to Home
The Process
One shell, followed the whole way. It is scraped off a plate in a restaurant, cleaned in fresh water, dried in the sun for weeks, bagged, boated out, and lowered into a steel cage on the seabed with a solar panel feeding it a low-voltage current.
Eleven steps, several months, and a lot of sunshine. The first five happen on land and are the part volunteers do with their hands. The rest belong to marine contractors and divers. This page is the whole chain, in order.
The chain at a glance
Gather, prepare, deploy. Everything below is an expansion of this one line. Scan it first, then read the detail — the sequence matters more than any single step.
Phase 01 · Steps 01–02
A waste stream is diverted. Shells leave the kitchen bin and become material.
Community work.
Phase 02 · Steps 03–05
The slow part, and the part that makes the shells safe to put in the sea.
Community work.
Phase 03 · Steps 06–11
Marine engineering. Steel, anchors, divers, a workboat and a low-voltage circuit.
Contractors and divers.
Phase one
A discarded oyster shell has already done its job once. Everything that follows is an argument that it can do a second one.
Step 01
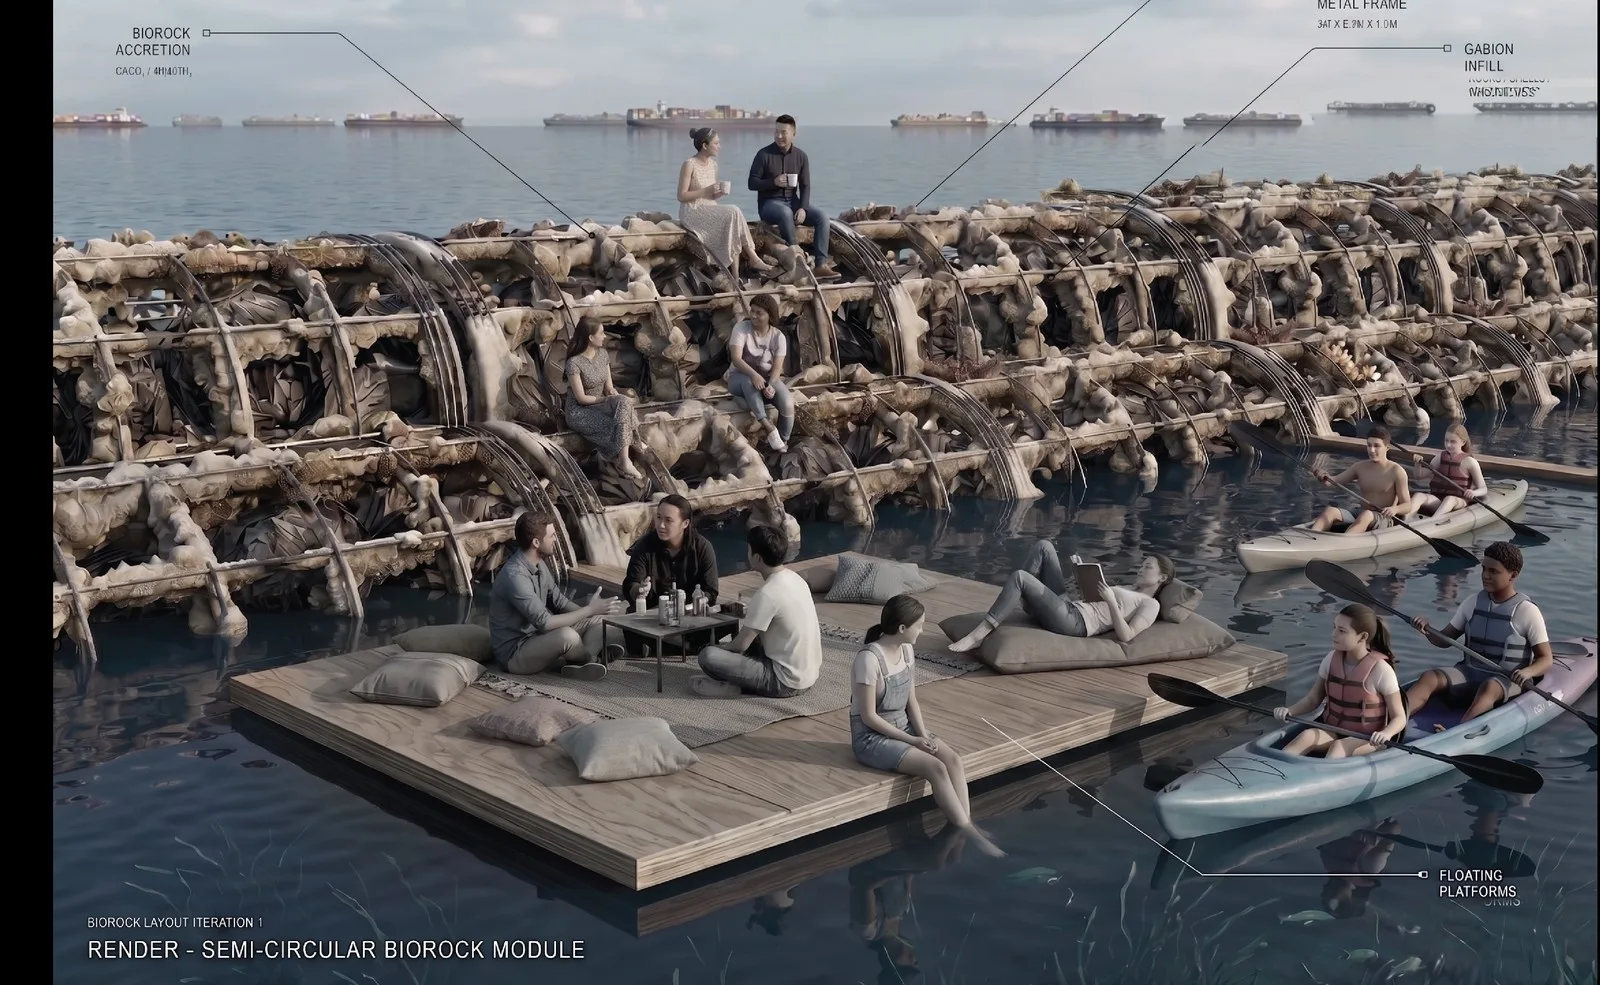
Shells are collected from local restaurants — oysters, mussels and cockles. This is a waste stream being diverted, not a resource being extracted. The shells were going to be thrown out either way.
Volunteers and local organisations are engaged to assist. The SHIELD proposal names collecting and processing shellfish material from restaurants explicitly as a planned community activity, alongside citizen-science biodiversity monitoring later in the project.
Number of restaurant partners: to be confirmed.
Step 02
Shells are separated from food waste and then sorted by type. That second sort is not housekeeping — it is the experiment. SHIELD tests two configurations side by side: Biorock filled with oyster shells, and Biorock filled with mixed shells. If the streams mix on the shore, the comparison is gone before anything reaches the water.
Phase two
This is the volunteer-heavy half of the process and the part that takes the longest. It is also the part that keeps the project honest: nothing goes into Singapore's water until it has been cleaned and dried past the point where anything can survive on it.
Step 03
Every shell is cleaned with fresh water. Flesh, grit and kitchen residue come off; what is left is calcium carbonate. Thorough freshwater cleaning is the first half of the project's biosecurity answer — the second half is the sun.
Step 04
Cleaned shells are laid out and left in the sun for weeks. Prolonged UV exposure from the sun naturally sterilises the surface of the shells, and marine species cannot survive such prolonged desiccation. Nothing living leaves that drying rack.
Why we trust it
This is not a theory borrowed from somewhere colder. It is the method Witteveen+Bos validated in Singapore's first artificial oyster reef, piloted here in 2023–2024. The pilot confirmed that sufficient UV exposure from the sun sterilises the shell surface — which is exactly what removes the risk of introducing invasive species to Singapore's marine environment.
It is the step people ask about first, and it is the one with the most evidence behind it. It is also, unglamorously, mostly waiting.
Step 05
Clean, dry shells are packed into mesh bags made of biopolymers, designed to biodegrade after at least five years. The bag has one job: hold loose shells together at deployment. After that, biological growth takes over and joins the shells to each other, and the mesh is no longer needed.
Bags are double-bagged — a direct lesson from the 2024 pilot. Doubling reduces material ripping and lowers maintenance cost over the life of the reef.
Bags are prepared in advance at a waterfront staging area so that deployment day is loading, not packing. HSL Constructor provides a temporary site to facilitate assembly and preparatory activities. The staging location is to be confirmed.
Phase three
From here it is marine engineering. The installation methodology below is the sequence the project plans to follow, in order, from a fabrication yard to a commissioned reef.
Step 06
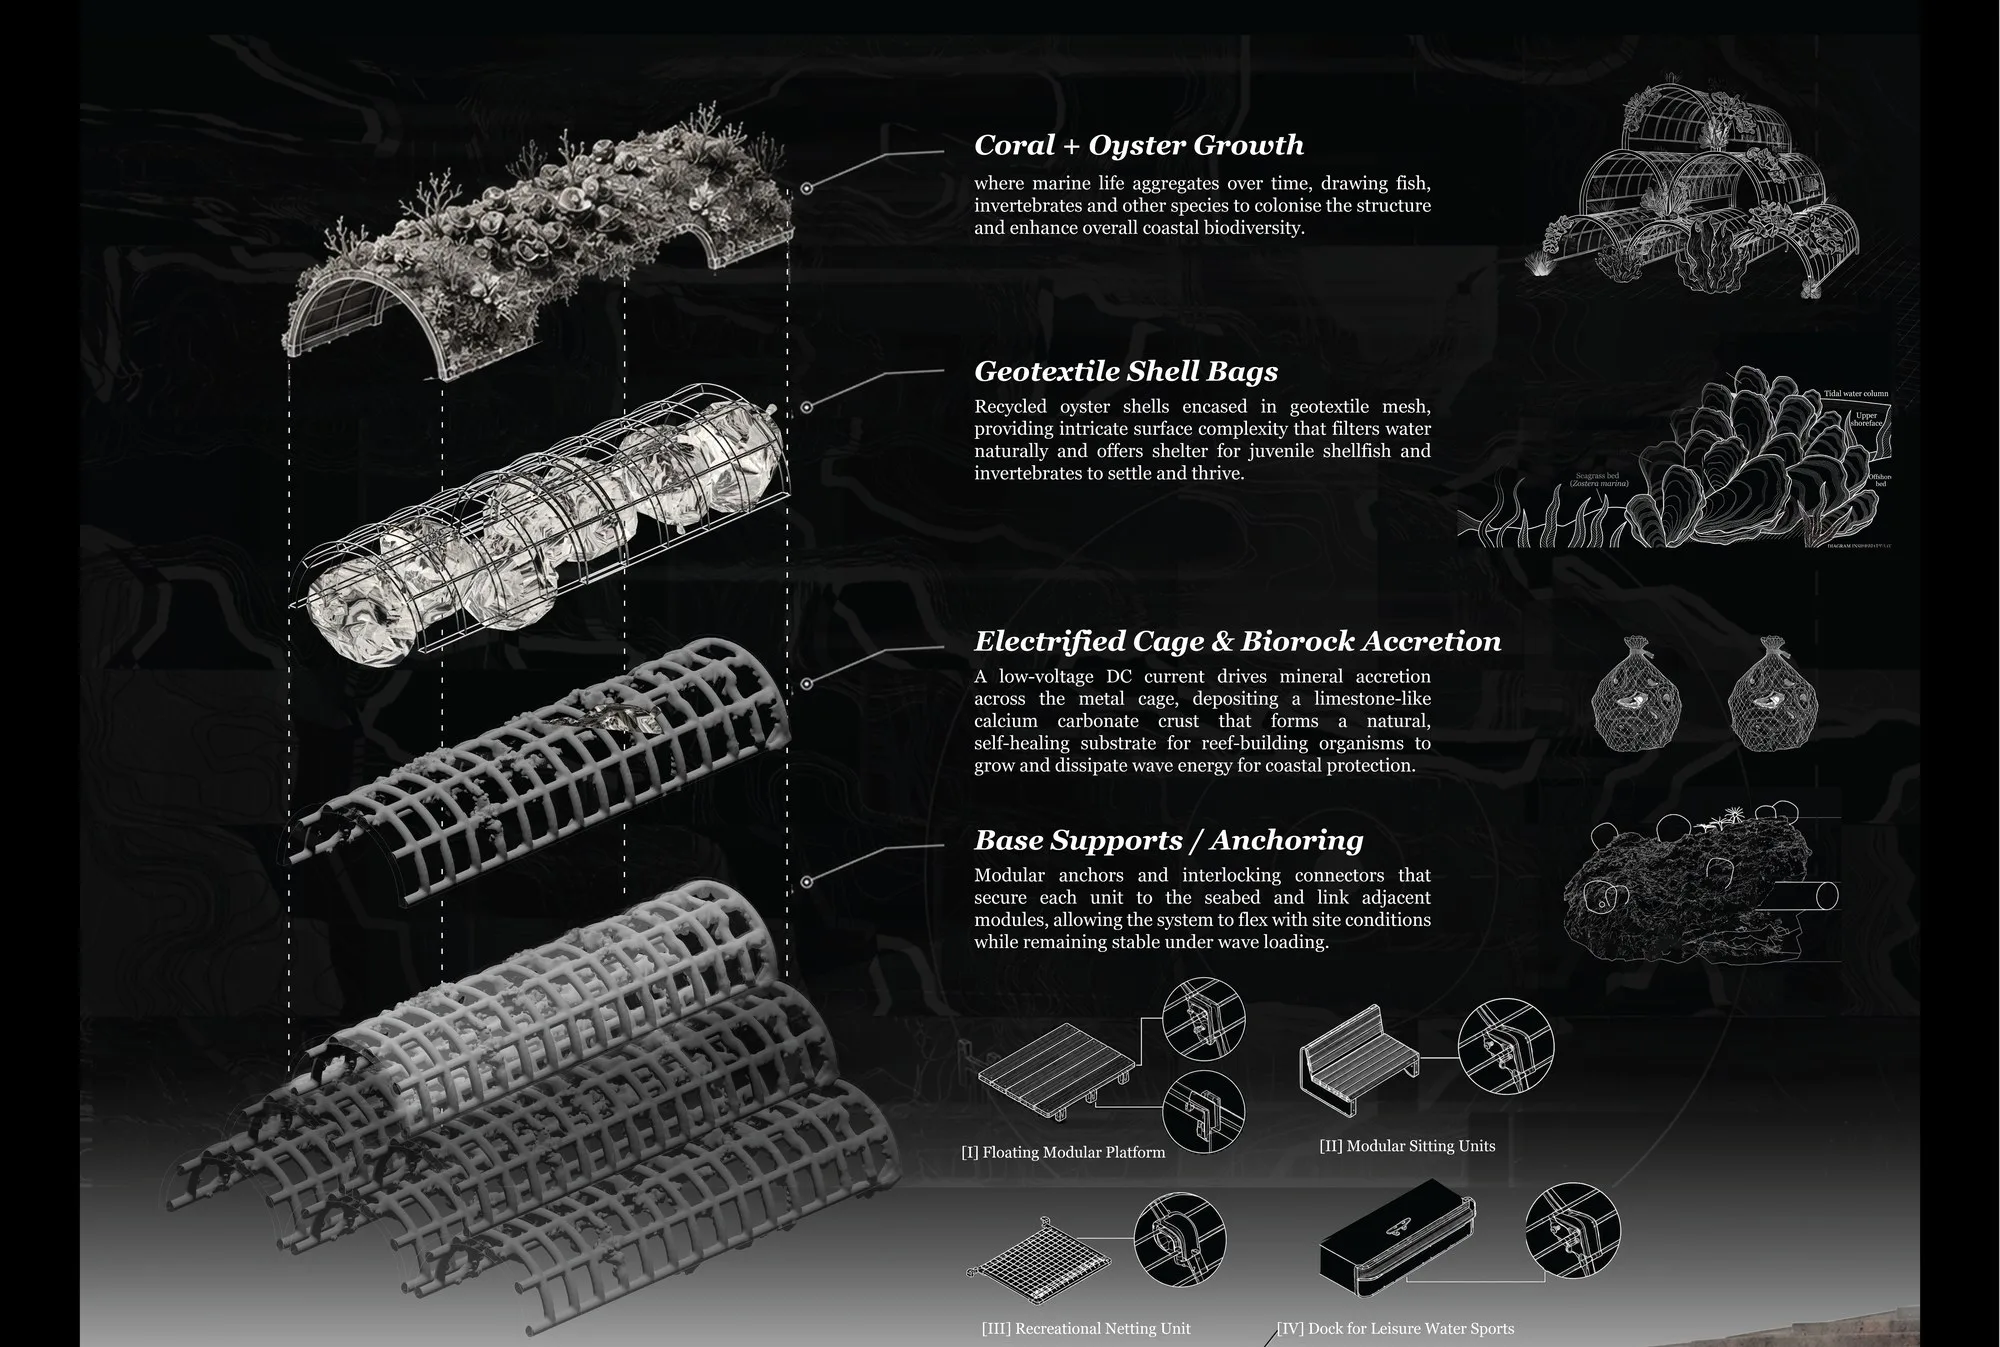
Steel cages are fabricated off-site to specification, then transported to the staging area to sit alongside the shell bags. Mlion Corporation, which leads the structural work, aims to use recycled steel to reduce the embodied carbon of the structure.
Step 07
A workboat carries the cages, the shell bags, the anchoring components and the installation equipment out to the deployment site. Movements follow marine safety guidelines. This is the moment the material stops being a shore-side pile and becomes a marine operation.
Step 08
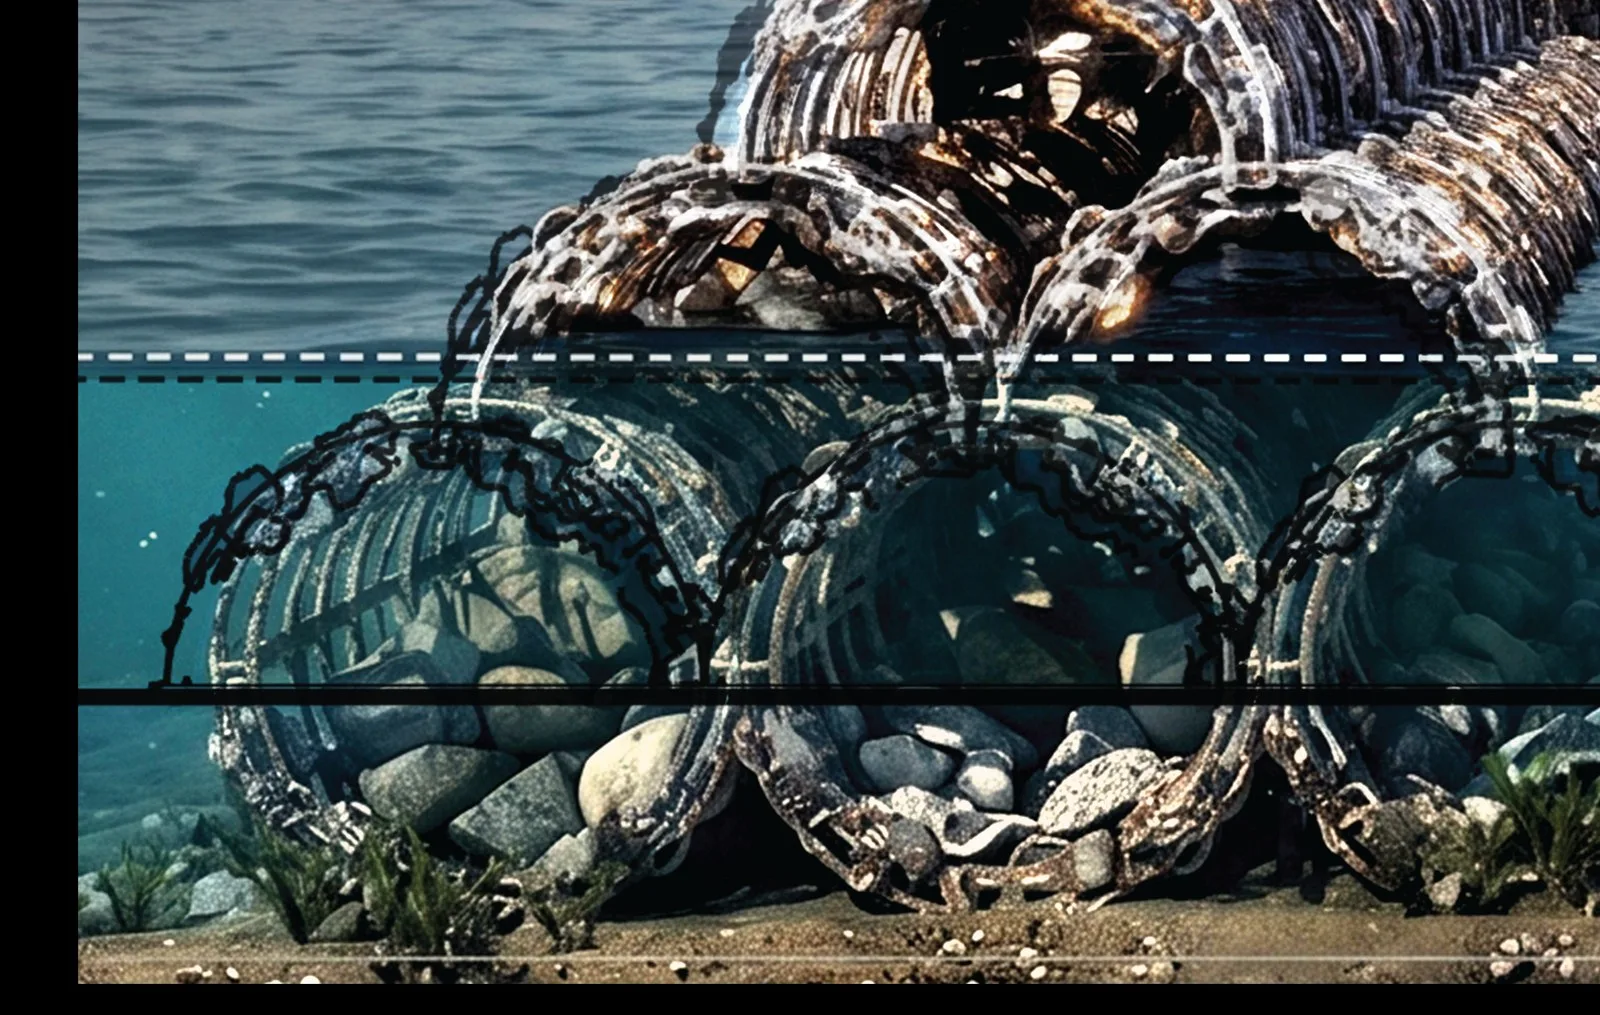
Divers and surface crew identify the exact placement locations based on water depth and seabed conditions. Cages are lowered from the boat and oriented on the bed. The reef is a designed geometry, not a dumped one — orientation is part of how it dissipates wave energy.
Step 09
Anchoring is chosen to suit the ground. Screw-type helical anchors give deeper embedment and high holding strength; reinforcing steel bar pins give shallow but firm anchoring in compact sands.
Concrete U-shaped ballast blocks are then pinned at critical junctions to resist scouring from waves and the seasonal monsoons. Singapore's water is not always calm, and the reef has to stay where it was put.
Step 10
Each cage is pinned to its neighbours to form a continuous matrix. That is what gives the system its layout flexibility and its resistance to lateral forces — the modules brace each other rather than standing alone.
Only once the cage network is secured on the seabed do the pre-packed shell bags go into each cage. Months of washing, drying and bagging arrive here, in the last few minutes of a dive.
Step 11
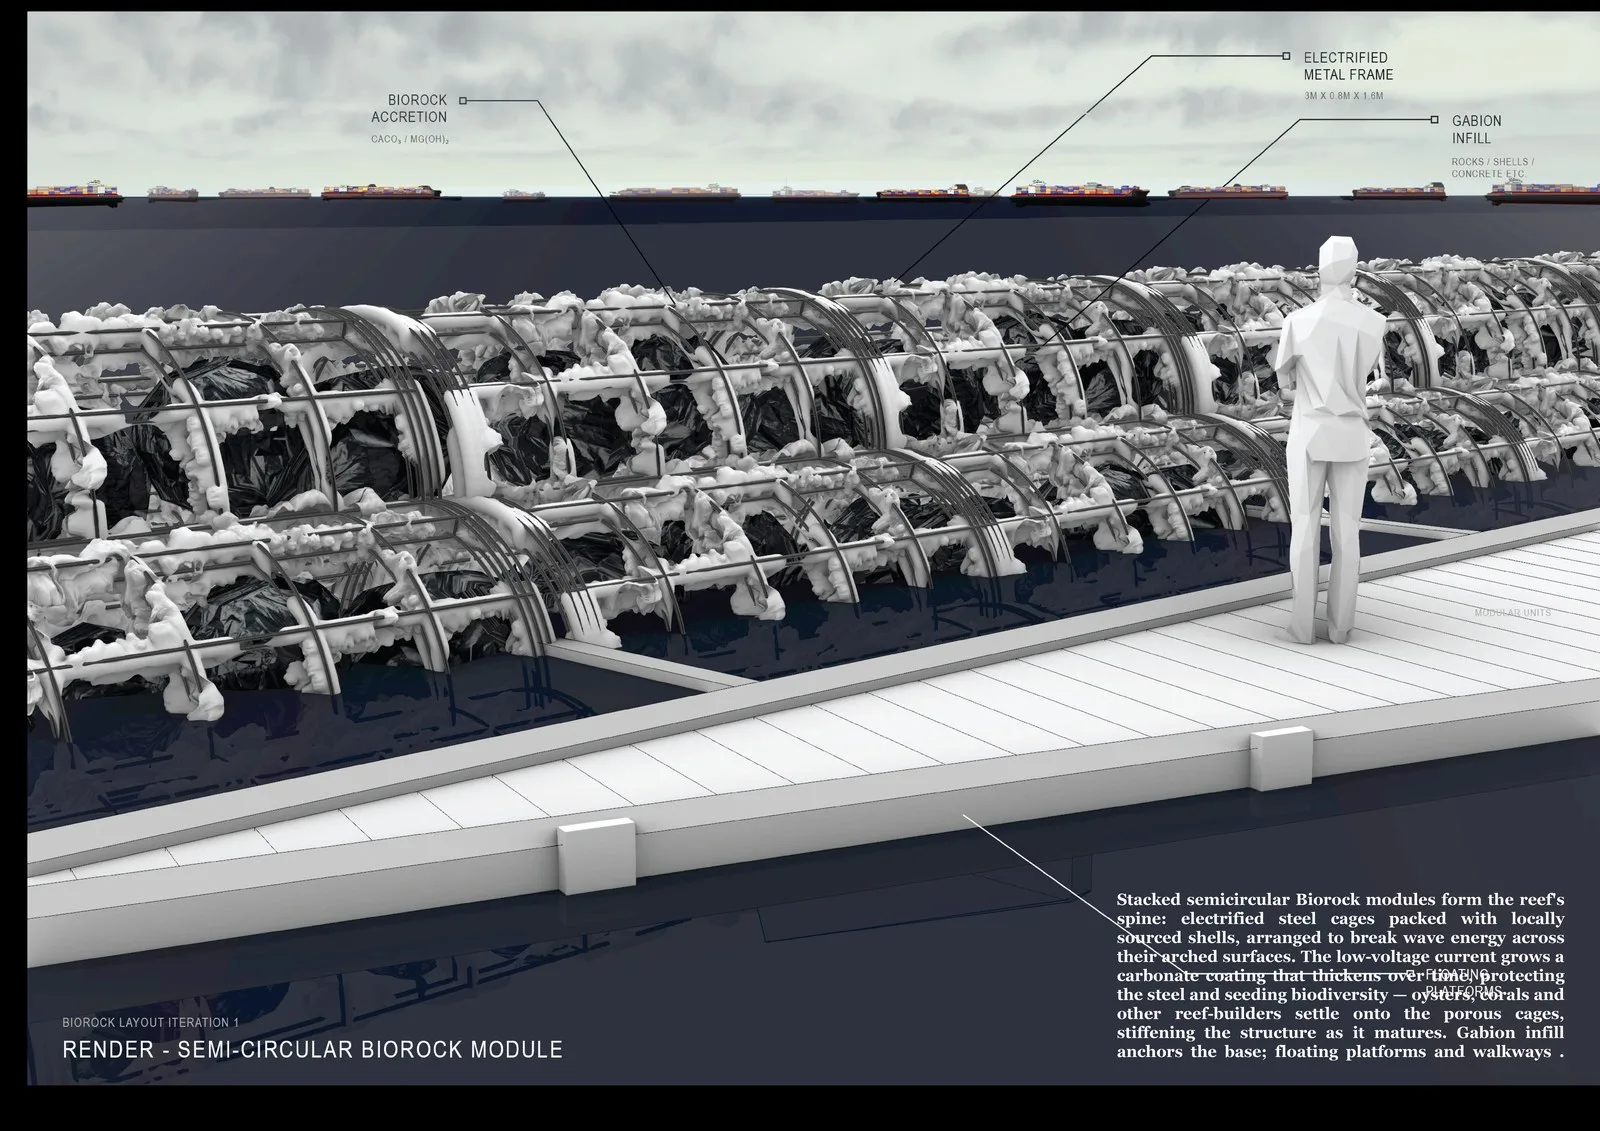
Low-voltage wiring is run across the cage system to one or two solar panels mounted nearby. That current is what drives the mineral accretion process: electrolysis grows a limestone coating on the steel, which prevents rusting, strengthens the structure over time and accelerates the growth of marine organisms.
Finally the anchoring, the structural connections and the electrical systems are inspected and tested, and the site is commissioned for monitoring. From that day the reef is a piece of research equipment as much as a breakwater.
The after
Most coastal structures start at their strongest and decline from there. This one is designed to run the other way.
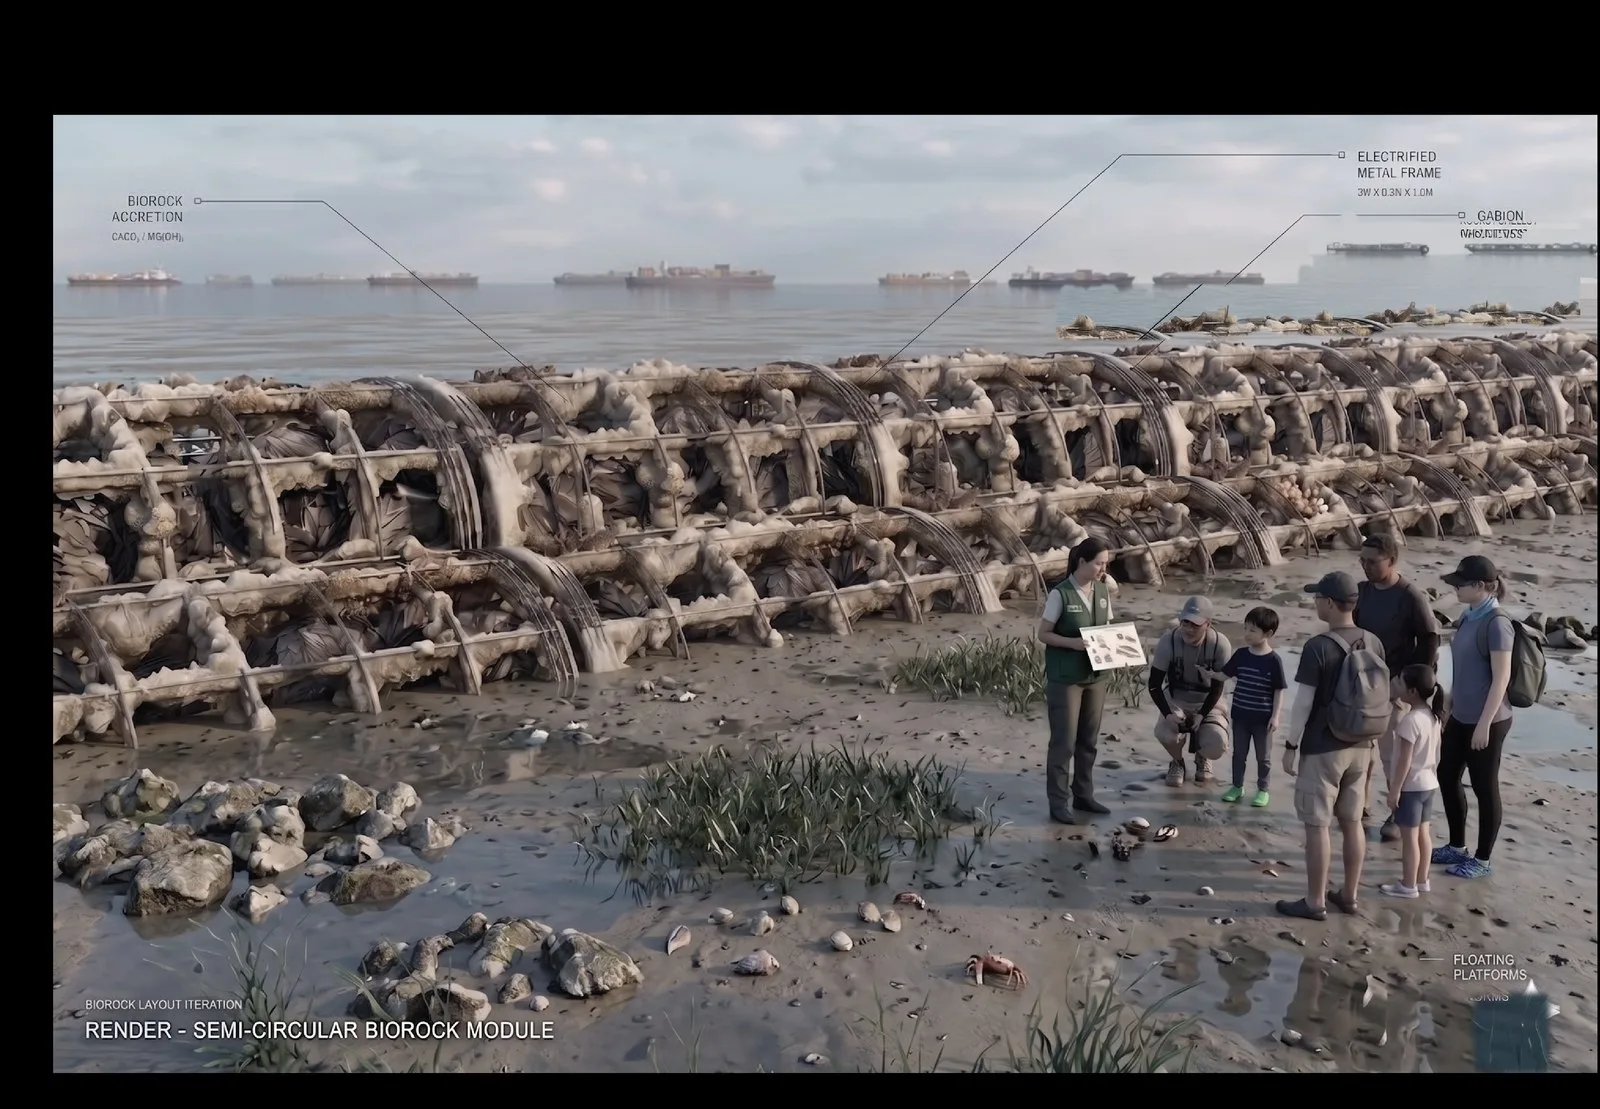
The Biorock coating builds up over time. Instead of corroding, the steel gains a limestone mineral layer that prevents rusting and strengthens the structure as the months pass. The same process accelerates the growth of marine organisms on the surface, and lowers the risk of the cyanobacteria blooms associated with untreated steel.
Shellfish recruit onto it. The reef sits in the intertidal zone — submerged at high tide, partly emerging at low tide — which is exactly the band where intertidal species live. In the 2023–2024 pilot, spat recruitment was observed on 49% of shells and species richness tripled.
Meanwhile the mesh bags biodegrade, as designed, after at least five years. By then they are not needed: biological growth has cemented the shells to one another. Biology has taken over the job the bag was doing.
In principle the reef system is a long-lasting structure that can persist with only very limited monitoring for many years. SHIELD's own monitoring programme runs for at least a year after deployment — wave gauges, biodiversity surveys, water quality, structural inspection — but the reef is not designed to depend on being tended.
Reversibility
A responsible project plans its own removal before it builds anything. SHIELD has a decommissioning methodology, and it is the deployment sequence run backwards, carefully.
The site is assessed and equipment mobilised before anything is touched, so that the removal is planned against the condition the reef is actually in rather than the condition it was installed in.
All low-voltage electrical components are safely disconnected first. The current that grew the mineral coating is the first thing switched off and the first thing removed.
Shell material is removed where biological growth has not firmly cemented it in place. Where growth has cemented it, that material has effectively become reef — which is the outcome the project was aiming for.
Ballast blocks and anchors are removed with minimal sediment disturbance. Where cages cannot be retrieved intact, they are mechanically disassembled underwater rather than dragged out whole.
Components are raised using inflatable lift bags. Retrieved steel is transported to approved scrap metal facilities for recycling. A final underwater inspection confirms that no debris remains on the seabed.
Who does what
Plainly: volunteers do the shore-side work. Steps 01 to 05 are community hands. Everything from loading the workboat onwards is done by marine contractors and divers.
Community · Steps 01–05
Collecting shells from restaurants, sorting them from food waste and by type, washing them in fresh water, laying them out to dry, and double-bagging the dry ones into biopolymer mesh. Later in the project, civil society and NGOs can also assist with biodiversity monitoring as citizen science.
The system uses simple materials and locally available shellfish waste, which is precisely why it has a low barrier to entry.
Contractors · Steps 06–11
Cage fabrication, loading and mobilising the workboat, positioning by divers and surface crew, anchoring and ballasting, pinning the matrix together, infilling the bags, running the low-voltage wiring to the solar panels, and commissioning. Specialist work, done under marine safety guidelines.
Deployment site and volunteer session dates are to be confirmed. The final site is confirmed by PUB.
Take a shore-side shift What to save from your plate
Onward
Questions about the process
If something here is unclear, or you run a restaurant and want to know what handing over your shells would actually involve, write to us. A short email is enough.